Ovidiu
How to create a ZIP code field with validation
Miembros necesarios
https://www.memberstack.com/scripts/validate-text-inputs
Tutorial
Clonable

Why/Use Cases
- Prevent users from entering data that isn’t appropriate for a specific form field.
Validating users’ field inputs on a Webflow site
Each form field typically expects a certain type of data (e.g. ZIP code), but sometimes users might get it wrong, often by accident (e.g. typos).
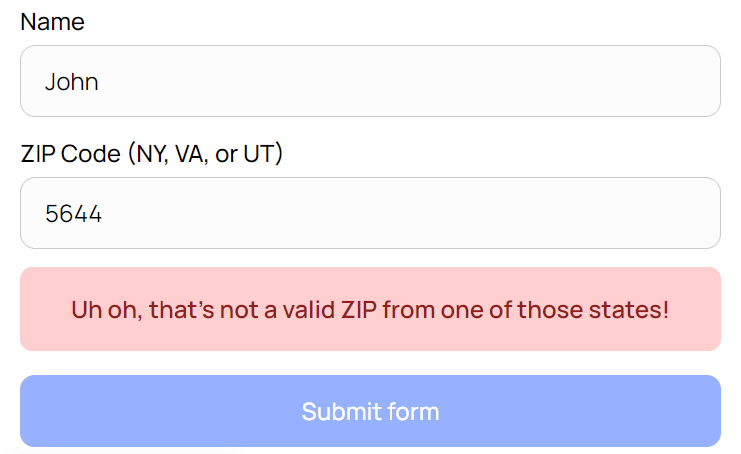
Validating form inputs allows you to immediately inform users if they’ve entered something wrong or unexpected and this guide will show you how to create a ZIP code field with validation.
It all works by providing a list of acceptable inputs or patterns and validating users’ inputs against that list.
To create a form field with validation on your Webflow site, we’re going to use MemberScript #127 – Validate Text Inputs. Follow the link to get the code you’ll need to add to your page and watch a video tutorial on how to set everything up.
Setting it up
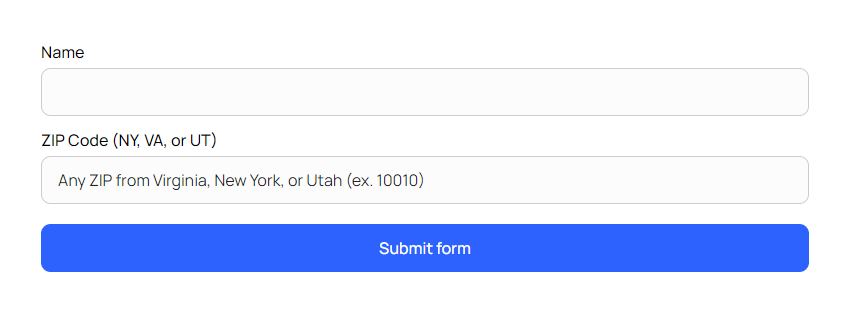
Start off by building and styling your form and when that’s done, add the following attributes to the field you want to have validation on:
· ms-code-require=”zip” – we’re using “zip” for the purpose of this guide, but that’s just an identifier that you can name however you want
· ms-code-require-list=”VALUE” – possible values discussed below
· maxlength=”5” – this one’s self-explanatory, it will simply limit the number of characters the input can have
For the list of acceptable values, you can simply enter a comma-separated list of values (e.g. 10000,10001,10002, etc.) or you can use certain variables to tell the field what type of inputs it should expect.
Variables can be described like this: {a0A}. In this example, an acceptable input is anything that is 3 characters long, as long as the first one is a lowercase letter, the second is a number, and the third is an uppercase letter. Here are some examples of acceptable inputs: v8Q, w4Z, r9D, etc.
You can use these in various ways, for example:
· 100{00} – any five-digit number will be accepted as long as it starts with 100; the last two digits can be anything
· abc{aA} – any five-letter word will be accepted as long as it starts with abc and ends with a lowercase letter followed by an uppercase letter
· 0000} – any four-digit number will be accepted
· aaaaa} – any five-letter word will be accepted as long as the letters are all lowercase
Next up, create and style an error (can be a simple div block) for unacceptable inputs below the field and add the following attribute to it:
· ms-code-require-error=”zip”
Optionally, you can add this attribute to the submit button:
· ms-code-submit-button=”zip”
What this does is it lowers the submit button’s opacity to 50% until the ZIP field is filled with an acceptable input. It also makes the button unclickable.
Hacer que funcione
Now that you’ve got everything set up in Webflow, all you need to do is add the MemberScript #127 custom code to your page, before the closing body tag.
Conclusión
That’s everything, you can now go ahead and test the form fields on your live site.
If you want to use our demo project to get you started, just click the button below to add it to your Webflow site.

Our demo can help you validate your users’ form inputs against a custom list of values on your Webflow site.
Take me to Cloneable!
Añada afiliaciones a su proyecto Webflow en cuestión de minutos.
Más de 200 componentes Webflow clonables gratuitos. No es necesario registrarse.
Añade membresías a tu proyecto React en cuestión de minutos.

.webp)


.png)
