

Ovidiu
How to optimize the loading experience on your Webflow site
Miembros necesarios
Tutorial
Clonable
https://webflow.com/made-in-webflow/website/skeleton-screens
Why/When would need to use Optimized Loading Experience?
- Keep visitors more engaged until everything loads.
- Improve the loading experience by making load times seem shorter.
Fast loading times are essential to keeping your bounce rate as low as possible. Sometimes, however, the illusion of speed is enough to keep people from leaving your site before it loads.
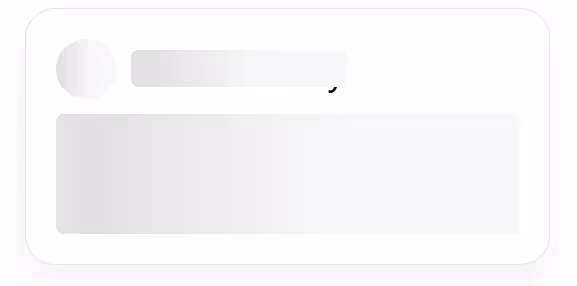
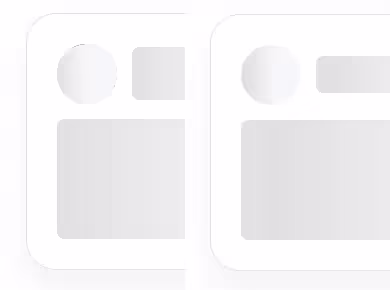
Enter skeleton screens, or content loaders – visual ways of informing visitors that your content is loading, keeping them around for longer. This method is proven to make the waiting time feel shorter than it actually is.
Skeleton screens work by offering a visual indicator that something is loading and this keeps visitors a bit more engaged for that extra second or two that’s needed for some elements to load.
You probably won’t want to use these on static elements that load instantly since there’s no real purpose to that. However, you will likely benefit from using these on web app related elements which have a bit of a loading time.
The point behind all this is to optimize the loading experience as much as possible and ensure that visitors aren’t bouncing before your content loads.
Adding content loaders to your Webflow site
In order to set this up, we’re going to use MemberScript #23 – Skeleton Screens / Content Loaders. Follow the link to get the code you’ll need to add to your page and watch a video tutorial on how to set everything up.
Setting up the loading animations
This step is fairly simple – all you need to do is choose which elements you want to display loading animations for and add this attribute to them: ms-code-skeleton=”VALUE”.
For the value, you need to add the time in milliseconds that the animation will play for. For example, a value of 1000 will display the animation for 1000 milliseconds, or one second.
Ensuring everything looks good
The loading animation is essentially an overlay that takes up the height of the box you see around elements in Webflow once you hover over them.

What this means is that if you have a string of text which, for example, contains letters like g, j, p, q, or y, you’ll need to make sure that they don’t extend beyond the text’s line height. If they do, the overlay won’t cover the entire text.
So always make sure that when you’re adding the loading animation to text, its line height is set accordingly.
Alternatively, you can also just add some padding to your text elements if needed.
Another thing to keep in mind is that this loading animation only works on text blocks and div blocks. If you add the attribute to an image, for example, it won’t do anything.
What you’ll need to do is put the image inside a div block and then add the skeleton attribute to said div block. Then you’ll want to add some padding to the div block of at least 1px. That’s because if you apply the loading animation to a div block of exactly the same size as the picture, an ever so tiny border will still be visible beyond the overlay, so you’ll want to extend it a bit.
Hacer que funcione
After you’ve added and configured the skeleton attribute to all the elements you want to hide behind a loading animation, all you need to do is add the MemberScript #23 custom code to your page, before the closing body tag.
You’ll notice that there are two versions of the code available – one for dark backgrounds and one for light backgrounds. Just choose whichever is right for your site.
Conclusión
That’s it, go ahead and publish your site and check out the new loading animations.
Llévame a los guiones
https://www.memberstack.com/scripts/23-skeleton-screens-content-loaders
Añada afiliaciones a su proyecto Webflow en cuestión de minutos.
Más de 200 componentes Webflow clonables gratuitos. No es necesario registrarse.
Añade membresías a tu proyecto React en cuestión de minutos.
.webp)


.png)

