v0.1
Marketing
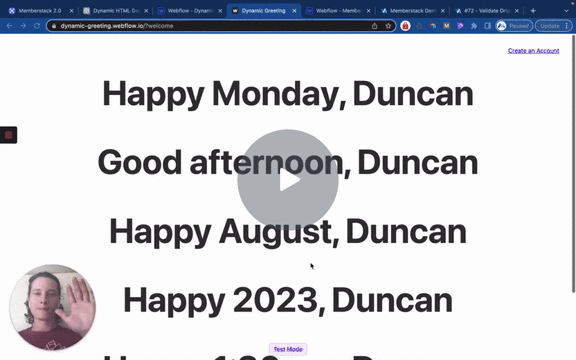
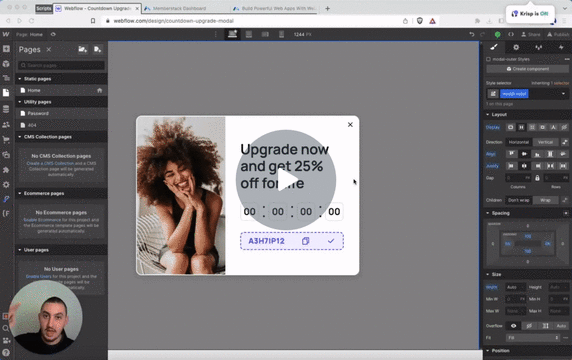
#9 - Cuenta atrás real basada en el usuario
Establezca dinámicamente un tiempo de cuenta atrás por usuario y oculte los elementos cuando se acabe el tiempo.
Añada fácilmente un deslizador de fotos de antes/después a su sitio Webflow.
Watch the video for step-by-step implementation instructions
<!-- 💙 MEMBERSCRIPT #112 v0.1 💙 - BEFORE & AFTER SLIDERS -->
<script>
document.addEventListener('DOMContentLoaded', () => {
const wraps = document.querySelectorAll('[ms-code-ba-wrap]');
wraps.forEach(wrap => {
const before = wrap.querySelector('[ms-code-ba-before]');
const after = wrap.querySelector('[ms-code-ba-after]');
// Create slider element
const slider = document.createElement('div');
slider.setAttribute('ms-code-ba-slider', wrap.getAttribute('ms-code-ba-wrap'));
wrap.appendChild(slider);
let isDown = false;
// Ensure proper positioning
wrap.style.position = 'relative';
wrap.style.overflow = 'hidden';
before.style.width = '�number100%';
before.style.display = 'block';
after.style.position = 'absolute';
after.style.top = '�number0';
after.style.left = '�number0';
after.style.width = '�number100%';
after.style.height = '�number100%';
slider.style.position = 'absolute';
slider.style.top = '�number0';
slider.style.bottom = '�number0';
slider.style.width = '4px';
slider.style.background = 'white';
slider.style.cursor = 'ew-resize';
slider.style.zIndex = '�number3';
const setPosition = (position) => {
const clampedPosition = Math.max(0, Math.min(1, position));
slider.style.left = `${clampedPosition * �number100}%`;
after.style.clipPath = `�funcinset(0 0 0 ${clampedPosition * 100}%)`;
};
const move = (e) => {
if (!isDown && e.type !== 'mousemove') return;
e.preventDefault();
const x = e.type.includes('touch') ? e.touches[0].clientX : e.clientX;
const rect = wrap.getBoundingClientRect();
const position = (x - rect.left) / rect.width;
setPosition(position);
};
const easeBack = () => {
setPosition(0.�prop5); // Move back to center
};
wrap.addEventListener('mousedown', () => isDown = true);
wrap.addEventListener('mouseup', () => isDown = false);
wrap.addEventListener('mouseleave', () => {
isDown = false;
easeBack();
});
wrap.addEventListener('mousemove', move);
wrap.addEventListener('touchstart', (e) => {
isDown = true;
move(e);
});
wrap.addEventListener('touchmove', move);
wrap.addEventListener('touchend', () => {
isDown = false;
easeBack();
});
// Initialize position
setPosition(0.�prop5);
});
});
</script>More scripts in Marketing